
TranceAddict Forums (www.tranceaddict.com/forums)
- Production Studio
-- Studio Buildout Discussion
Pages (4): « 1 [2] 3 4 »
Oh as an aside. If you're doing construction for your hobby, and your hobby isn't construction then you may well have gone off the deep end!
I have no idea if I'm ever going to be releasing tracks commerically again. I'd love to, but if not I want a room I can grow old, fat and happy in. :-)
| quote: |
| Originally posted by Diginerd I'd love to, but if not I want a room I can grow old, fat and happy in. :-) |
| quote: |
| Originally posted by jahnlay Polystyrene is porous, just the air gaps are very small, do some research and you'll see. |

Hey Diginerd,
This is really interesting stuff.. I know people dream of things like this but when I get a place of my own, I'm going to convert a loft into a studio so I'll be keeping an eye on this thread.
Best of luck!
Thanks for the support..
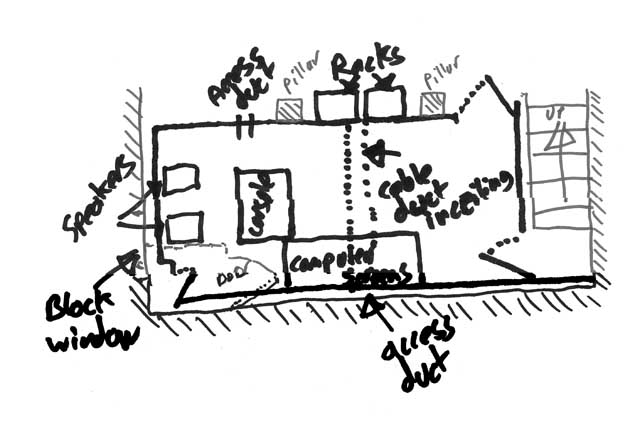
Ok here's some chicken scratch drawings.
1st up Floorplan:-
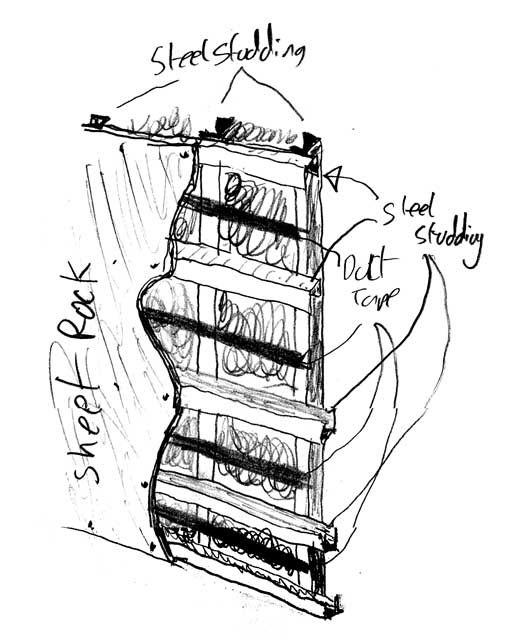
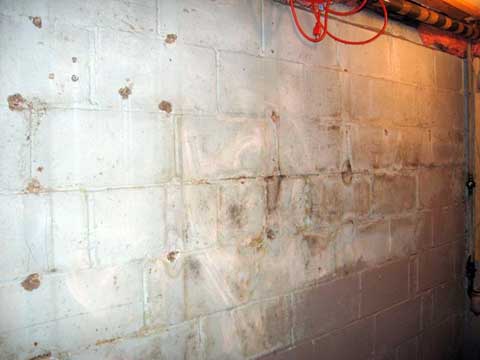
And here's how I plan to build the walls, once I rip off the panneling. The scribble is rockwool.
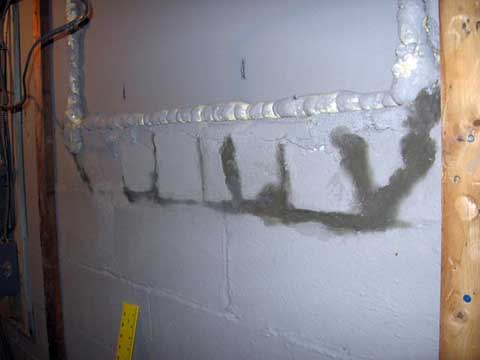
Say goodbye to the window....
1st of all put up black plastic so from the outside nothing looks too untoward...
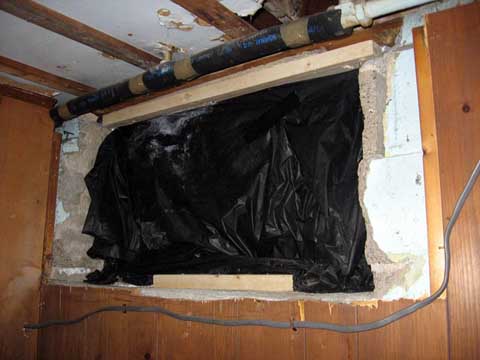
Next put up a piece of 1" ply and fix and fill (Great stuff) around the edges.
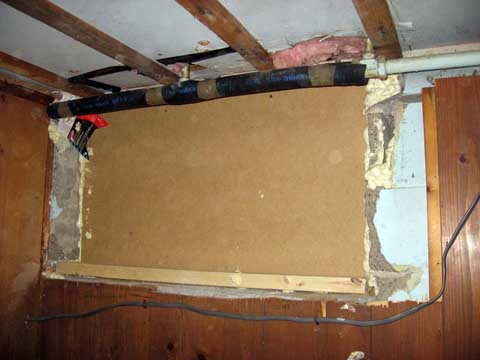
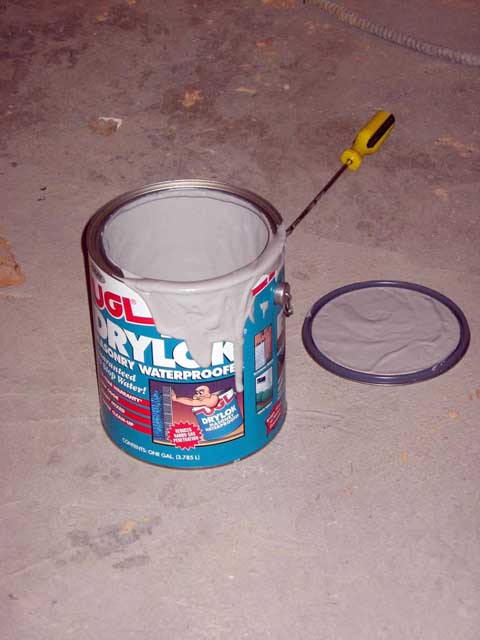
Finally rip off the chintzy wooden panneling, put up a second piece of Ply (packign the gap between the two panels with rock wool, seal that in too and coat the whole lot in Dry Lok. Add some hydraulic cement to seal up all the cracks around the windows whilst we're at it.
Next up, destruction of the Power panel closet and the first lot of studding is going to go up..
Are you going to make hardcore ?
You`ve wrecked that place before you began.
Lol
______
never the less, you can make a nice place of it.
You should see the mess I made when I trashed the closet and ripped all the panneling off the walls..
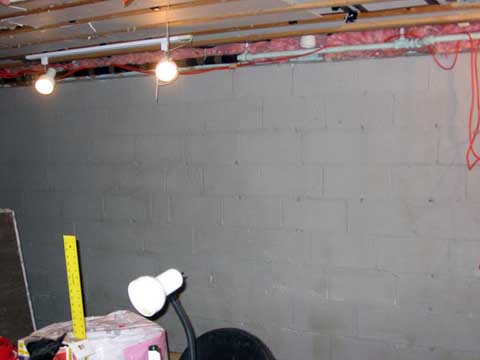
So, this weekend was productive.
Finished ripping out all the panneling on the walls, ripped down the closet containing the breaker board, painted the window wall with sealant, got the studing up on the window wall (And moved a power cable), & packed the gaps between studs with rockwool
I also finished packing out the ceiling with rock wool, and sealed up all the holes. I also decided to fill the gaps between the wooden slats with an additional layer of sheetrock (For mass).
Unfortunately all that condenses to two pics!
I do promis I'll get around to posting some pics and graphs of my models explaining the method behind my madness.
Also at some poitn I suppose I need to consider patchbay design too.
Nice work.
Just two things:
Why not close the window with concrete ore bricks? Those would give you way better sound insulation.
Why cover the whole wall with another layer that basically does nothing more than take away some space? Wasn't your room below the ground up to the lower edge of the window?
1. I have to leave the option of at some point restoring the window. Replacing the window would have been permit hell), so my sealing although looking pretty brutal is considered "Temporarary"!
Also the way I've sealed it is pretty effective, neither one of the 1" boards is connected to the same timber frame mounted to the wall, and there is an air gap half packed with rockwool.
2.
A) I needed to reduce the dimensions of the room.
B) Once there is an airgap infront of the rock wool and 2 layers of sheetrock infront of that the whole wall acts as a LF Absorber (As will the others).
At the end of that I should be in the fortunate position of only having to damp mids and highs in the rooms using foam (ie the infamous eggcrate foam that everyone considers as treatment). LF which is the usual problem in this kind of space is being taken care of by room construction. No need to in-room bass traps.
| quote: |
| Originally posted by Diginerd A) I needed to reduce the dimensions of the room. |
| quote: |
| Originally posted by Diginerd B) Once there is an airgap infront of the rock wool and 2 layers of sheetrock infront of that the whole wall acts as a LF Absorber (As will the others). |
| quote: |
| Originally posted by Diginerd (ie the infamous eggcrate foam that everyone considers as treatment) |

A) Because by tweaking the dimensions I got to make the trade between cutoff and modal response.
Given the dimensions I had to start with I'm shooting for 85" high, 105" wide, and 157" Long as the overall inside "Box".
It's not quite accurate (nor is it anywhere near as big as I'd like), I'll will have to have a small protrusion for an new Power cabinet, and a couple of recessed doors.
As an aside, I'm going for 1 hour rated solid core fire doors as they're much cheaper than dedicated accoustic ones.
B) Aware of that, hence mucho modelling prior (And a fair amount of discussion)
C) I was joking.. We'll see what it needs when it goes up. :-)
Below are some modelled responses.
This one is the raw untreated room (With wall construction as described)

And What CaraCad Has to say about it:-

Here's with some Accoustic foam scattered around the model

and again CaraCAD's Take

Of course until it's built we'll not know the accuracy of the model, but I'm pretty sure it will be close enough to tweak in.
My main concern is bass trapping, and this overall build handles that. Mid and HF Absorbtion / diffusion comes later.
More studding tonight.. :-)
This is taking some time.. :-)
Most of the studding is up on the long wall, hoping by the end of the weekend to have all the insulation in place, the duct in and possibly some sheetrock up on the first wall.
I look like I may have scored 45 Pieces for free which can't be bad!!
They just finished building out a new cafeteria at work and these were left over, slightly damaged pieces. Since 2/3 of the sheetrock I'm going to use is going to be hidden this could work out really well.
In terms of room acoustic treatment, I would suggest a few things...
-make the studio space rectangular, rather than cubic, as cubic rooms have far too many modes to deal with and are a mess in terms of acoustic value in general.
-considering the inherent costs, don't bother with floating the room in the sense of neopreme support with cement/wood on top. It would require a wealth of other work to have the rest of the room's treatments live up to the isolated nature of the floated room concept.
-to get rid of your cable mess and allow for acoustic treatments, I would suggest just as you brought up woth your first chicken scratch drawing... to hand the cables inside a cable duct in the ceiling. Try to figure out your best workable number of inputs/outputs possible at one time for your console and computer interfaces. From there, you'll know what kind of audio snake you'll need.
-A largely ignored part of home studio design is HVAC. Keep ventilation as much as possible (both you and your gear take value in CLEAN, quality air. Insulate where the air ducts lie in the walls and ceiling using some foam tubes and such inexpensive insulating materials to avoid rattling and ricketting ducts.
-Revolve your designs around your ideal listenning position. Your console, computer, patch bay and rack gear should revolve around your working habits and not the other way around.
-What's under the stairs? Take advantage of the space under the stairs, and work around and support structure in there. It's a great place for power and HVAC/cooling conditionning equipment.
-take a measurement of the rectangular space in the basement (I'm talking 100% rectangular) and disclude the stairs. Post the measurements here and I'll work up some dimension, treatment, and design suggestions. I love attacking a home studio space. I designed a space for my final project in college for this type of stuff (audio engineering)
-post up these measurements...
computer system desktop space required, monitor dimensions, console dimensions, rack (rectangular) space, projected space for keyboards, etc.
-lastly... $2000 is a strict and very doable budget, but with the right DIY creativity and throughtful choices at the hardware store, you can make a shweet studio space. I was recently thinking up ways to turn half of my basement bedroom into a production space with a $500 budget for treatment and structure alone.
| quote: |
In terms of room acoustic treatment, I would suggest a few things... -make the studio space rectangular, rather than cubic, as cubic rooms have far too many modes to deal with and are a mess in terms of acoustic value in general. |
| quote: |
| -considering the inherent costs, don't bother with floating the room in the sense of neopreme support with cement/wood on top. It would require a wealth of other work to have the rest of the room's treatments live up to the isolated nature of the floated room concept. |
| quote: |
| -to get rid of your cable mess and allow for acoustic treatments, I would suggest just as you brought up woth your first chicken scratch drawing... to hand the cables inside a cable duct in the ceiling. Try to figure out your best workable number of inputs/outputs possible at one time for your console and computer interfaces. From there, you'll know what kind of audio snake you'll need. |
| quote: |
| -A largely ignored part of home studio design is HVAC. Keep ventilation as much as possible (both you and your gear take value in CLEAN, quality air. Insulate where the air ducts lie in the walls and ceiling using some foam tubes and such inexpensive insulating materials to avoid rattling and ricketting ducts. |
| quote: |
| -Revolve your designs around your ideal listenning position. Your console, computer, patch bay and rack gear should revolve around your working habits and not the other way around. |
| quote: |
| -What's under the stairs? Take advantage of the space under the stairs, and work around and support structure in there. It's a great place for power and HVAC/cooling conditionning equipment. |
| quote: |
| take a measurement of the rectangular space in the basement (I'm talking 100% rectangular) and disclude the stairs. Post the measurements here and I'll work up some dimension, treatment, and design suggestions. I love attacking a home studio space. I designed a space for my final project in college for this type of stuff (audio engineering) |
| quote: |
-post up these measurements... computer system desktop space required, monitor dimensions, console dimensions, rack (rectangular) space, projected space for keyboards, etc. |
| quote: |
| -lastly... $2000 is a strict and very doable budget, but with the right DIY creativity and throughtful choices at the hardware store, you can make a shweet studio space. I was recently thinking up ways to turn half of my basement bedroom into a production space with a $500 budget for treatment and structure alone. |
Holy crap that was a big post.. Covered a lot of gound though.
Sorry guys!
For the doors try to find some cheap light wooden doors, remove the filling and fill up with fine sand.. should be a little cheaper than the fire doors with nearly the same effect.
According to Bolt (Bolt, R.H., Note on Normal Frequency Statistics for Rectangular Rooms, J. Acous. Soc. Am. 18, 1 (July 1946) p. 130-133) your room dimensions could be further improved with a length of about 135"-144". This would of course also affect room cutoff.
Got the room to 142" long.. Not too shabby..
Also lots of construction over the last couple of days:-
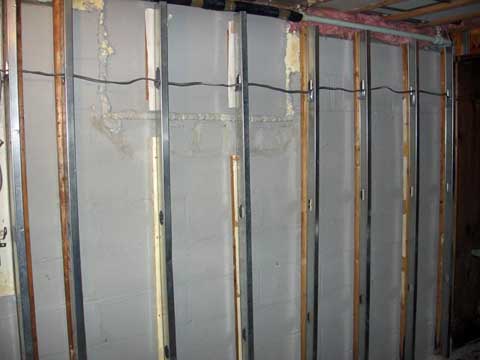
Sealed up the long wall:-
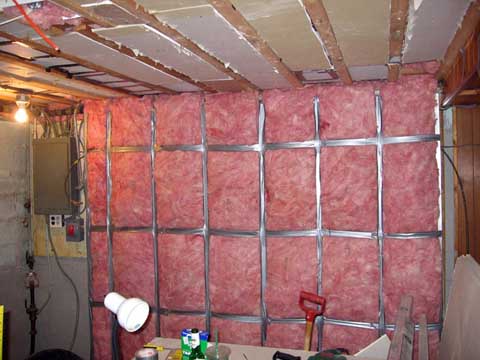
And built studding and insulated the long wall:-

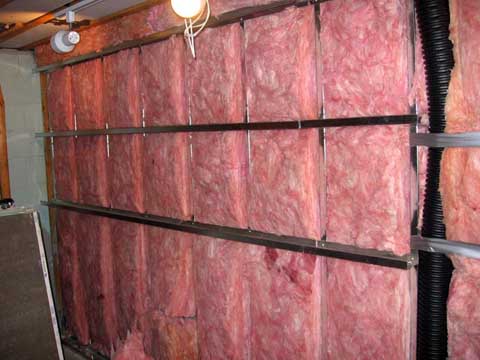
The black pipe running vertically is the end of the cable duct running accross the ceiling.
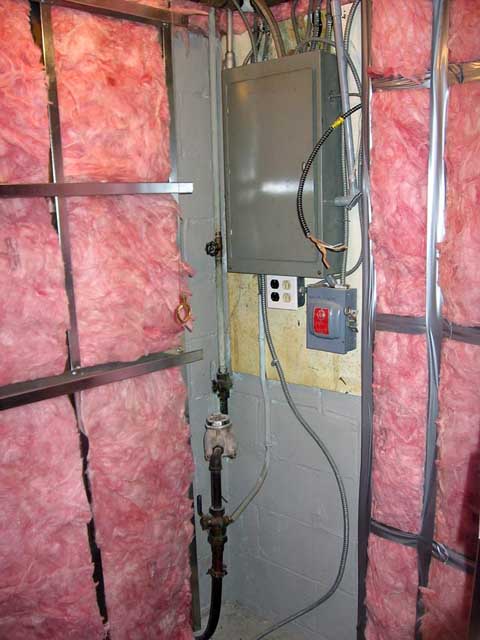
Finally here's the lurverly main breaker panel that used to live in the big closet.. The loose power cable is going to go to the outlets in the stusio, and is NOT live.
its comng on well! are you doing it all yourself or do you pay sparks, builders etc?
Digi, as soon as I get my monitors you are so going to have to help me sort out my room acoustics because frankly, they eat donkey nuts.
I thought of getting some aurelex panelling but if I was honest about it, I havent got a clue how to set them up and have no idea whether they work better than DIY sound insulation. They cost muchos $$$ as well 
I'm doing everything myself, I'm not to shabby in the old handiwork department. :-)
The only bit I get slightly nervous about (even though I fully understand it) is mucking about with the main breaker board.
That is :-
a) Very dangerous, and will easily kill if done wrong
b) Very dangerous, and will easily kill if done wrong
c) Very dangerous, and will easily kill if done wrong
In short don't try this at home...
Oveall this build has been very rewarding so far..
 maybe some rubber shoes come in handy.
I have some gloves, but still I'd rather not touch.. :-)
Between causing ruckuses in other threads I've got my first two bits of sheetrock up and the first set of studding for the partition wall.

Mounting the racks is going to be fun.
I'm planning on placing a wooden 2 x 3 vertically behind each of the steel studs that are going to have the rack strip screwed to for additional strength and load bearing capabilities..
| quote: |
| Originally posted by Diginerd I have some gloves, but still I'd rather not touch.. :-) |
Powered by: vBulletin
Copyright © 2000-2021, Jelsoft Enterprises Ltd.