
TranceAddict Forums (www.tranceaddict.com/forums)
- DJ Booth
-- Taking apart and painting a technics?
Taking apart and painting a technics?
I recently saw a video serious of this guy who tells you how to take apart your technics down to just the faceplate for cleaning or replacement :
http://www.youtube.com/watch?v=CDYgjwdQ55s
Anyways I was wondering if anyone has ever taking theirs fully apart, and if anyone has tried painting it, how well the results came out. The guy says you have to solder at just one point in taking two circuit boards apart, but I have never soldered a single thing in my whole life. Think I could do it?
theres a tutorial floating on the net, someone usually posts it once a while here but its been a while. Basically a step by step walk through in pictures. Some slick paintjob and extra leds under the platter i think. maybe someone can dig it out for ya.
great video, well done to the guy that made that because he's put in loads of work and detail.
| quote: |
| Originally posted by ZeJayMan great video, well done to the guy that made that because he's put in loads of work and detail. |
| quote: |
| Originally posted by Saint John Yeah he did do an awesome video. All im asking though is if anyone has actually done it and how easy it is for a beginner. I'm not trying to fuck up my turntable |
i do have to say though, if you're not familiar with taking apart electronics and putting them back together (and having them work), starting with your turntable might not be the best idea
| quote: |
| Originally posted by Tony Morello i do have to say though, if you're not familiar with taking apart electronics and putting them back together (and having them work), starting with your turntable might not be the best idea |
I pulled mine down and have repainted them a metalic blue colour. I still need to put them back together but they are packed away due to interstate move late last year.
I would definately not recomend if you have not done some practice on other things. The tonearm wiring is soldered and is very fine wiring.

yea, if there's soldering involved, i'd make sure you know what you're doing and can solder properly, otherwise you can risk messing things up good
then you'll be up the ol shit creek without a paddle
| quote: |
| Originally posted by DJ RANN I used to be a service engineer for technics |


| quote: |
| Originally posted by Dervish Just remember which goes where, |
PORN:
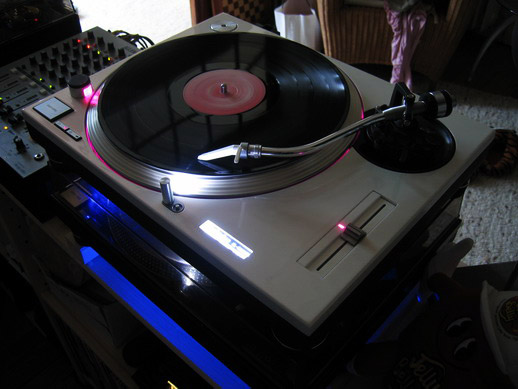
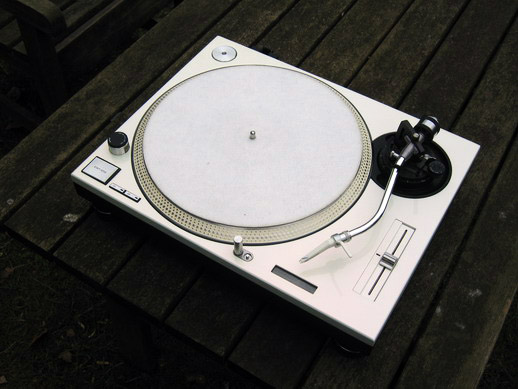


http://www.12x0.de/index.php?forum-showposts-214
| quote: |
| Originally posted by palm PORN: http://www.12x0.de/index.php?forum-showposts-214 |
flashy lights < what you play.
it looks cool for sure, but i would never do this, i fail to see the point.
if ur planning on having it in your livingroom its a pluss that it looks good. especialy if ur trying to avoid fights with chicks lol.
| quote: |
| Originally posted by ******** soldering isn't difficult just try not to overheat the solder, or apply heat directly to the wiring, as it can transfer to the other end of the wire, melt plastic etc... if it is "very fine" wires rather than the thicker copper than it could melt the wiring. You can get soldering irons for 10$ on ebay . Soldering is way less complex than oxyacetalyne or arc welding. just try not to overheat anything, and it would help if you check your temperature enough.. to melt you solder (which should be the right mixture) but not your wiring, or board. Also solder can be toxic so you may try to do so in a ventalated area. Same goes with cleaning.. make sure you clean your rod/gun the right way and not to inhale any abrasives or powder |

Powered by: vBulletin
Copyright © 2000-2021, Jelsoft Enterprises Ltd.